Page no: D72
See also under BackupBuddy
Latest Backup Buddy Files
| Site Name | Location | Avg Size | Copied to Pcloud | What backup? | last export date |
| SNBCHF | pCloud\#Exports\SNBCHF | 5.8 gb | YES | Backupbuddy | 2017.06.08 |
| It.snbchf | In our VPN | 23.3 gb | No | Backupbuddy | 2017.06.09 |
| WordPress-pro/blog | pCloud\#Exports\WPblog | 1.0 gb | YES | Backupbuddy | 2017.06.09 |
| Austrian | In our VPN | 18.2 gb | No | Backupbuddy | 2017.06.09 |
| Cental – Banks | pCloud\#Exports\Economic Blogs\20170608 | 1.31 gb | YES | Backupbuddy | 2017.06.09 |
| European | pCloud\#Exports\Economic Blogs\20170608 | 6.76 gb | YES | Backupbuddy | 2017.06.09 |
| Heterodox | pCloud\#Exports\Economic Blogs\20170608 | 3.55 gb | YES | Backupbuddy | 2017.06.09 |
| Leaders | In our VPN | 2.94 gb | YES, but not the last one | Backupbuddy | 2017.05.02 |
| Macro | In our VPN | 31.4 gb | No | Backupbuddy | 2017.06.09 |
| Swiss | pCloud\#Exports\Economic Blogs\20170608 | 6.08 gb | YES | Backupbuddy | 2017.06.09 |
Explanation |
Pics and Video |
Backup Buddy mailOur backup buddy email, which controls if everything with backup buddy’s backups is fine is [email protected]. Currently is redirected to Niki’s mail and he is controlling if there is any problem. |
Backup Buddy mail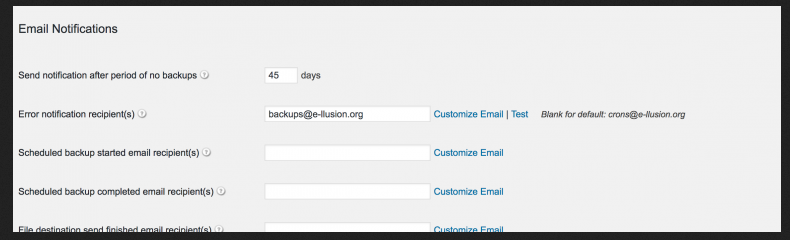 - Click to enlarge |
Excluding videosMy site contains a lot of videos. They are too big for a normal backup, so I do only backups of the database. However, the images are not stored. Currently it is not possible in this version of BackuBuddy |
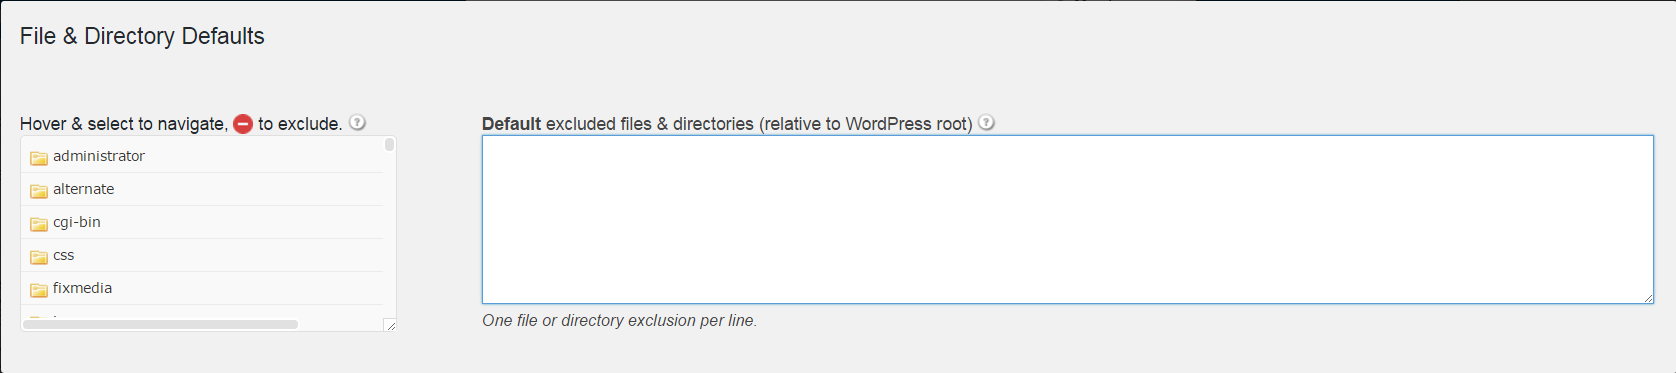 |
If not known, ask Backup BuddyThere is nothing in backup buddy help and faq section about this subject. Find file type exclusion in full backup. Should be possible. It is, see screenshot: pattern: *.webm. Apparently, it did not work. But I was able to create a full backup file 23 GB |
|
Manual backupsCurrently we do one full manual backup every month as part of Monthly report |
|
Create weekly schedule for full backup, on it.snbchfWeekly backup is not a problem, because it is not reliable enough. We have server backup system, which is taking care for daily backups of all of the DBs and Files. Backupbuddy is used only for manual backups. |
|
Evaluate if you should upgrade to new version (that maybe excludes videos)Currently no. The new version does not have so many new functionalities. This one is doing pretty good job for the moment. 75$ for one year with latest version (25% coupn) for 10 sites is not so many, but probably on next major version. |
|
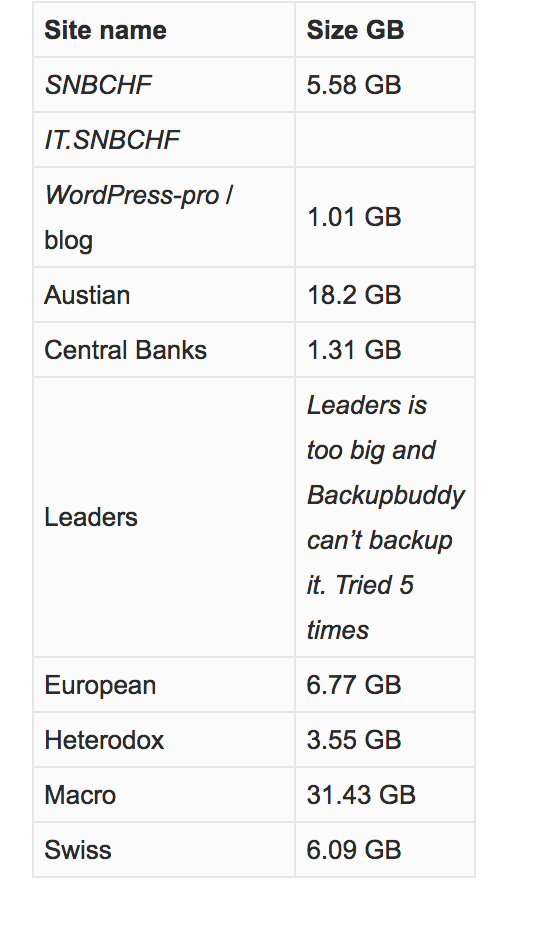
Backupbuddy problems due to very big size of the sitesPreviously we had issues with IT.Snbchf due to too many videos, but when we delete the videos and start using vimeo instead all the problems are gone. Currently we still had issues with Leaders due to too many images & posts and very big size of the backup file. We try different workarounds and fixes but Backupbuddy just can’t handle such big websites. We use manual backup problems instead. |
|
Restore Backup BuddyRestore Backup Backup Buddy (no trello card) Trello Summary: Empty |
|
Step 0Check if the backup size can be reduced, removing Duplicate images |
|
Step 1) Making backupWe need to make backup of our core wordpress site, where we made the tests and finish the setuping of feed plugin and others. This can be done via BackupBuddy plugin. Under BackupBuddy -> Backup we can see the page, where all the backups are. There are two buttons for manual backups. We have to click on “Complete backup”. After that BackupBuddy will start to backuping our site and we have to wait. |
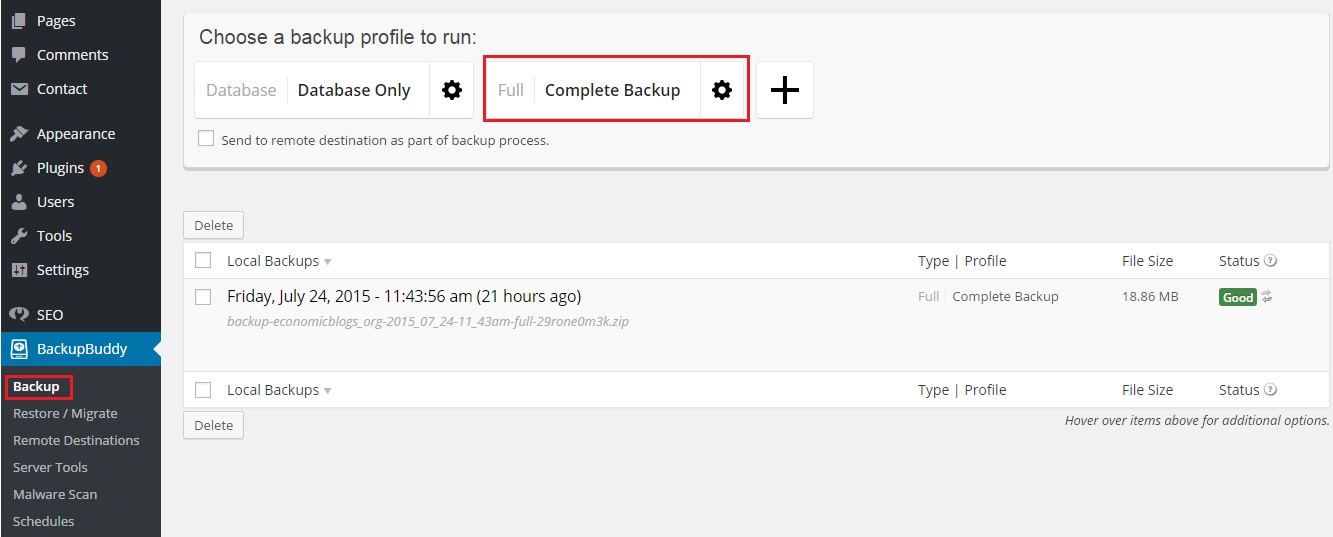 BackupBuddy: Step 1 making backup |
Step 2) Downloading the backupAfter 5 to 10 mins the plugin will create the backup and we have to start downloading it. Via the blue button “Download backup file”, we will start downloading the zip file, which contains all our files and the DB. We have to save it to our computer. The downloading process depends on the size of the backup. Probably 2 to 5 mins. |
 BackupBuddy: Step 2 download the backup |
3) Setup importbuddy.phpWe will need another file from BackupBuddy plugin. With which we will unzip and install the site. It is called importbuddy. Via BackupBuddy -> Restore / Migrate we will see all our backups in the table. Above the table we will see two buttons and instructions how to use importbuddy.php. We need to click on the first blue button “Download importbuddy.php”. After that the system will ask for password. We must enter password and remember it, because it will be needed later. |
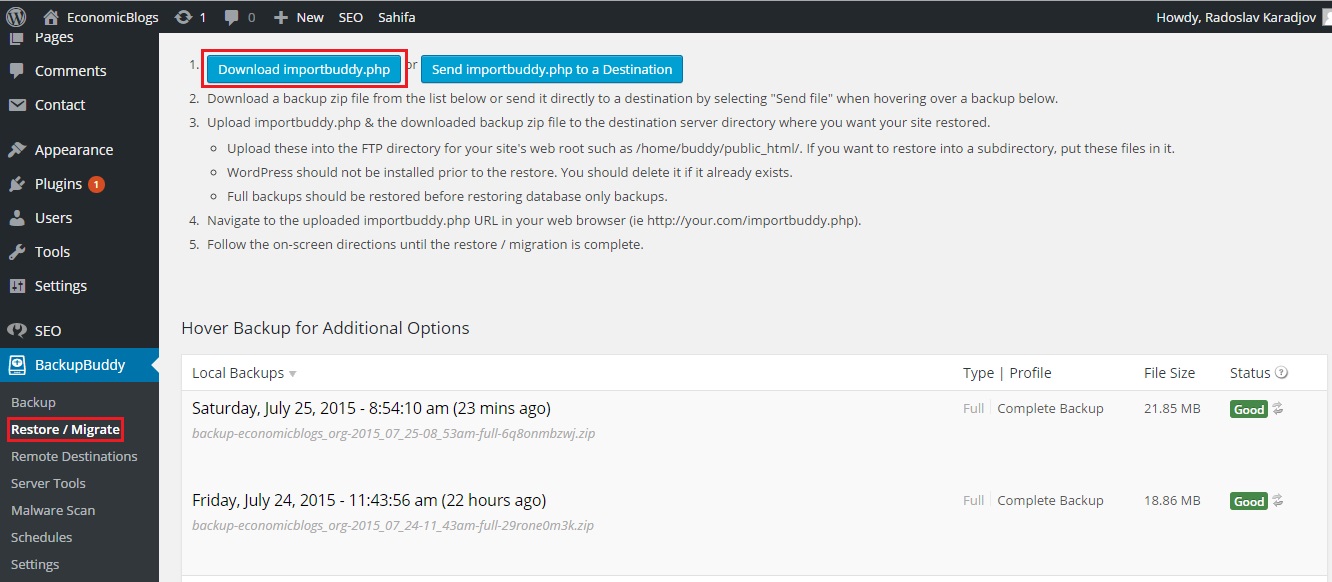 BackupBuddy: Step 3 download importbuddy.php |
4) Adding the usersWith the three steps above we are ready with the core version of our feed sites. Now we need to setup the account and the subdomain for the new blog. Next steps will be done from VestaCP. Full documentation can be found here. We firstly need to add the user. It has to be done from the admin user. Under User menu, we have to select the green button “Add user”. From there we need to add the username, password, email of the owner and names of the owner. When we add all the needed information, we have to save. The user will be added. |
 |
5) Adding the domain (subdomain) to a user
|
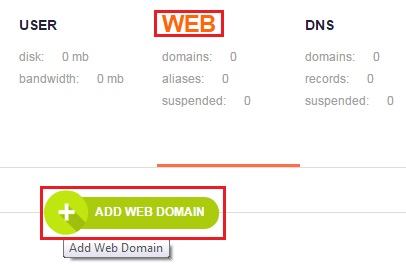 VestaCP: Step 5 add domain - Click to enlarge |
| In the form the only action is to add the domain (subdomain) and click on “add” button. That’s it. |
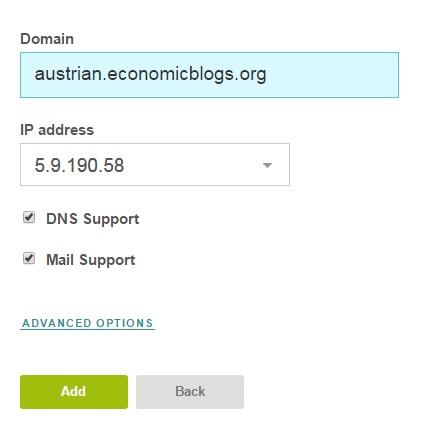 VestaCP: Step 5 Adding domain - Click to enlarge |
6) Making DB and user DB
|
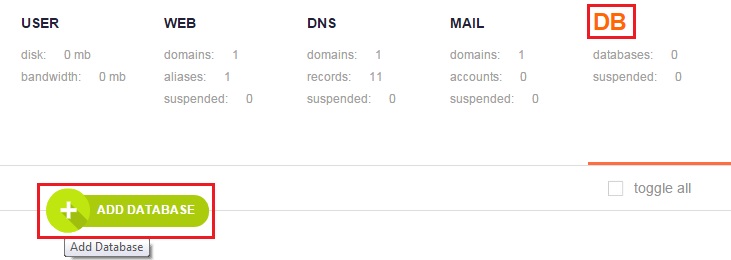 VestaCP: Step 6 making DB - Click to enlarge |
7) Uploading the backup via FileZillaNow we need different software for uploading the backup. We suggest FileZilla – free and open source. We have to log in into the server with the user and password from Step 4. After that we need to navigate to the domain folder and there we need to upload the backup and importbuddy from Step 1 and Step 3. The estimate time for uploading is 1 to 5min. |
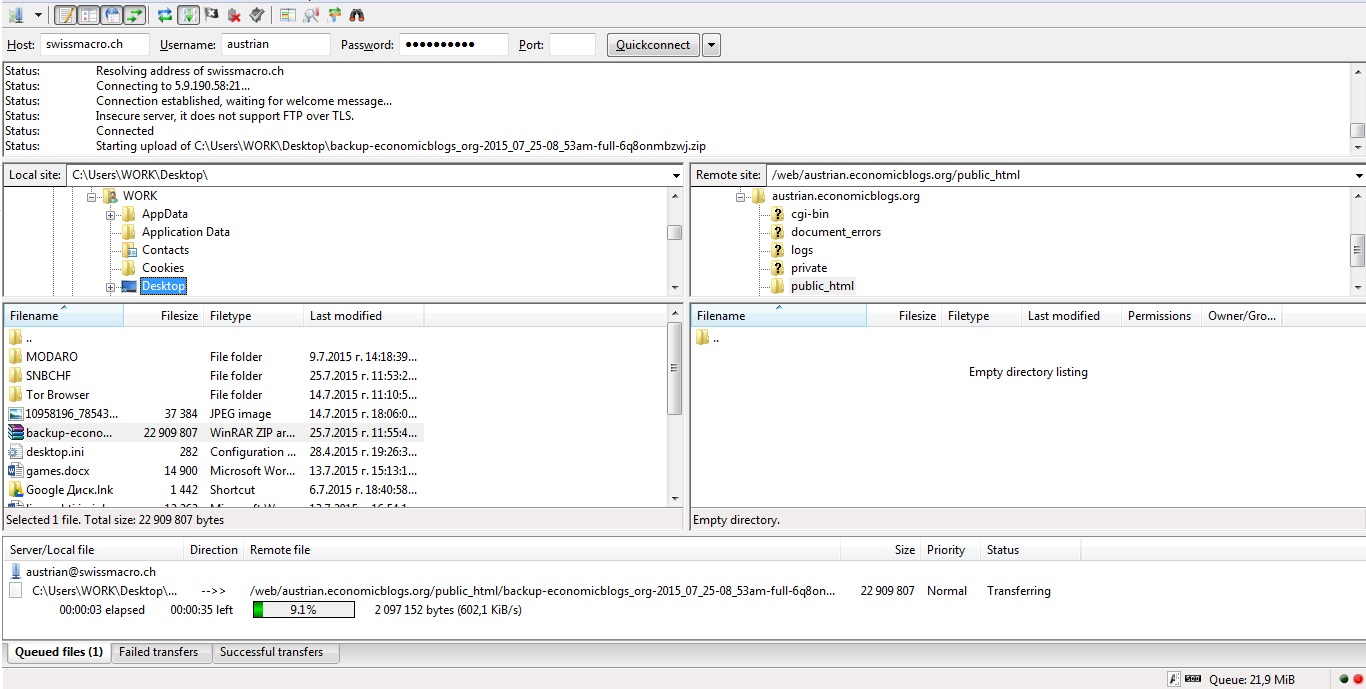 Filezilla: Step 7 uploading the backup and importbuddy - Click to enlarge |
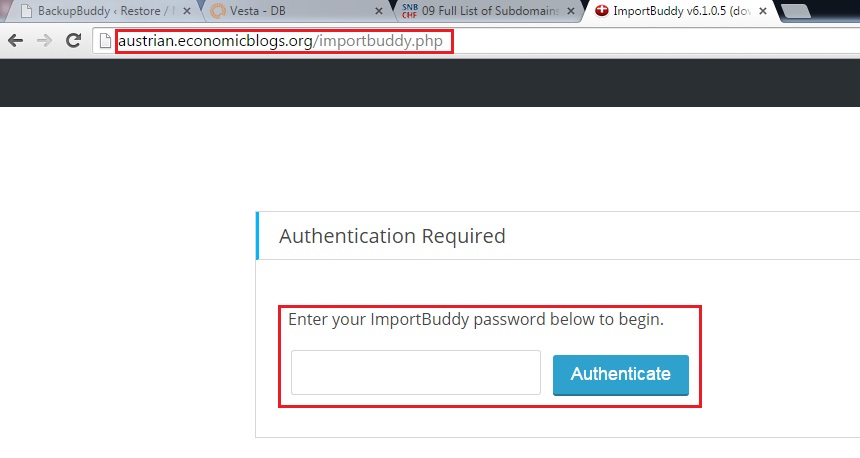
8) Open the importbuddy.phpWe have to navigate via the browser to “subdomain.com/importbuddy.php” where subdomain is the domain from Step 5. After that we have to enter the password from Step 3. Then the installation wizard begin. |
Step 8 |
9a) Importbuddy: Select backup to restoreOn Step 1 from the wizard we have to select the backup from Step 1 and continue to Step 2. The estimated time will be 1 to 2 mins and if there is no any error, you will be redirected directly to Step 3 from the wizard. |
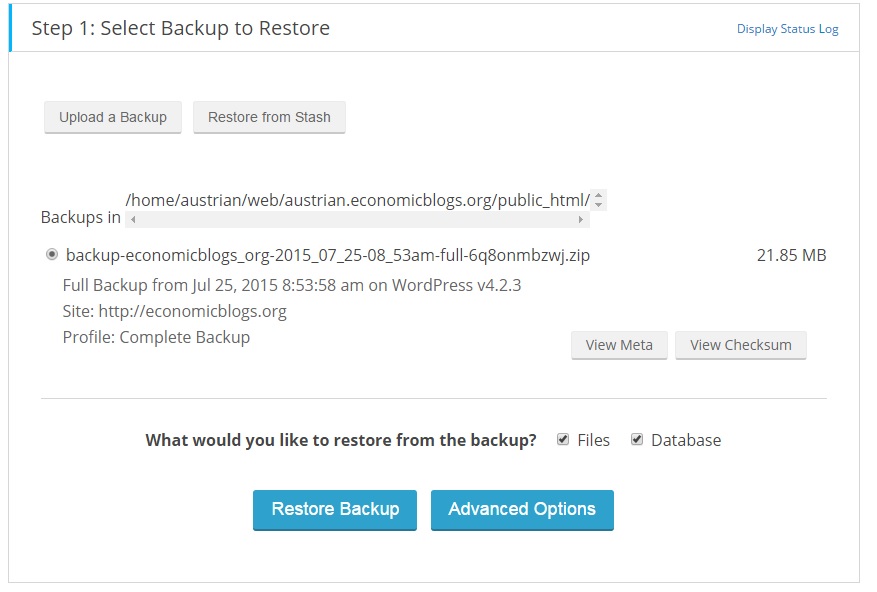 ImportBuddy: Step 9a Backup restore |
9b) ImportBuddy: DataBase settingsOn Step 3 from ImportBuddy we have to add the database settings from Step 6 (VestaCP: Adding DB). After that continue with the wizard. If there is no any error, we will be redirected on Step 5 from ImportBuddy. |
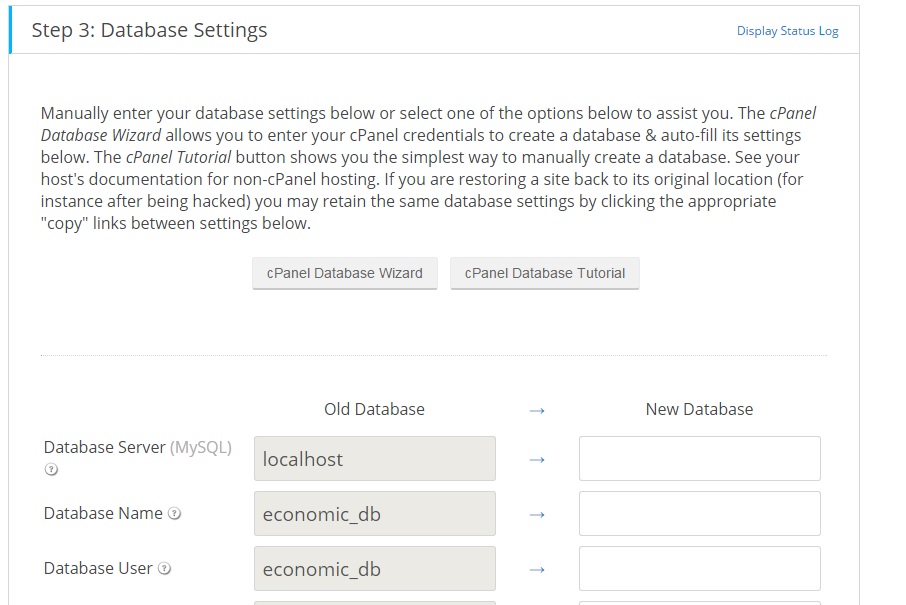 ImportBuddy: Step 11 Filling up the db settings - Click to enlarge |
9c) ImportBuddy: Site settingsOn the last step from the installing wizard we have to set the new domain name. It will be auto-filled, so we only have to click on the blue button “Next step”. |
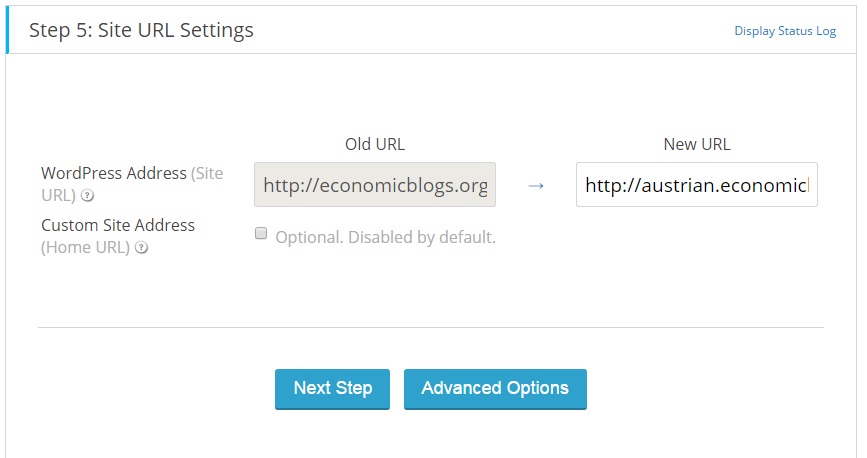 Importbuddy: Step 11 Site settings - Click to enlarge |
Examine backup server on George-FBI was already planning it, but the complaint moved to do things quicker. I got two NAS running on George-FB Space questions: Movies would go to Bulgaria via gotomyPC connection The files are too many and too big to create such a backups. It will slow down the whole server. And they are very insecure. Most of the times, they are broken. I tried this in the years before and for big websites are not a problem. |
See more for