Page no: N78
Explanation |
Videos and Pics |
OverviewSynology Connection Overview When you’re away from home or the office, you might wish to access your Synology NAS over the Internet. DSM includes options to easily set up remote access, allowing you to log in to DSM and other services by simply entering a custom domain name in a web browser. This article provides steps to configure remote access using QuickConnect or EZ-Internet, so you can start accessing DSM or other services from anywhere, anytime Contents |
Synology Connection Overview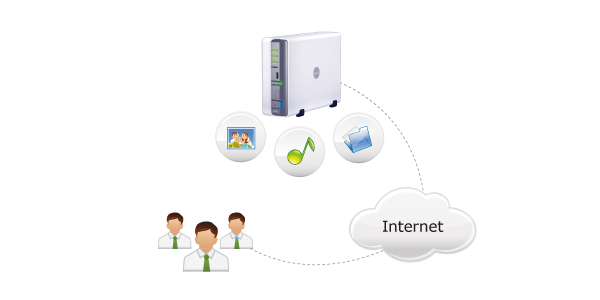 - Click to enlarge |
QuickconnectHow to Enable Quickconnect 1. Before you start
2. Enable QuickConnect to access Synology NAS over the Internet Below we’ll provide instructions to access DSM using QuickConnect.
|
How to Enable Quickconnect - Click to enlarge |
Register MyDCRegister MyDC Account If you don’t have a MyDS Center account, register one by clicking Register now. Then enter your email address, a password, and name. Then click OK. |
Register MyDC Account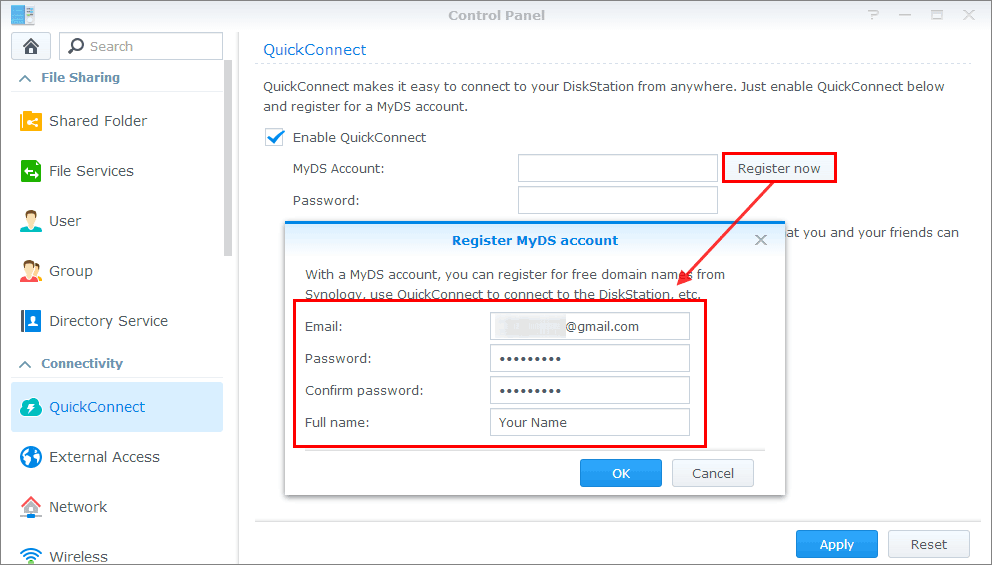 - Click to enlarge |
Quickconnect IDApply Quickconnect ID Enter your desired QuickConnect ID in the QuickConnect ID field. Then click Apply. |
Apply Quickconnect ID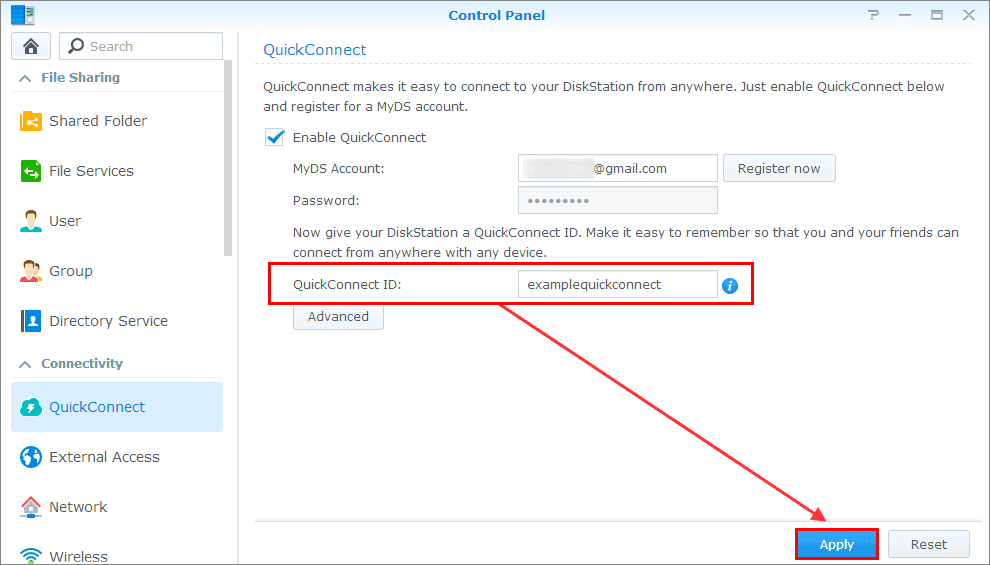 - Click to enlarge |
DSM sectionQuickconnect success displays DSM section If the specified QuickConnect ID is available, a section should appear displaying your QuickConnect ID and the address with which DSM can be accessed. In this example, the address for DSM is http://quickconnect.to/examplequickconnect. |
Quickconnect success displays DSM section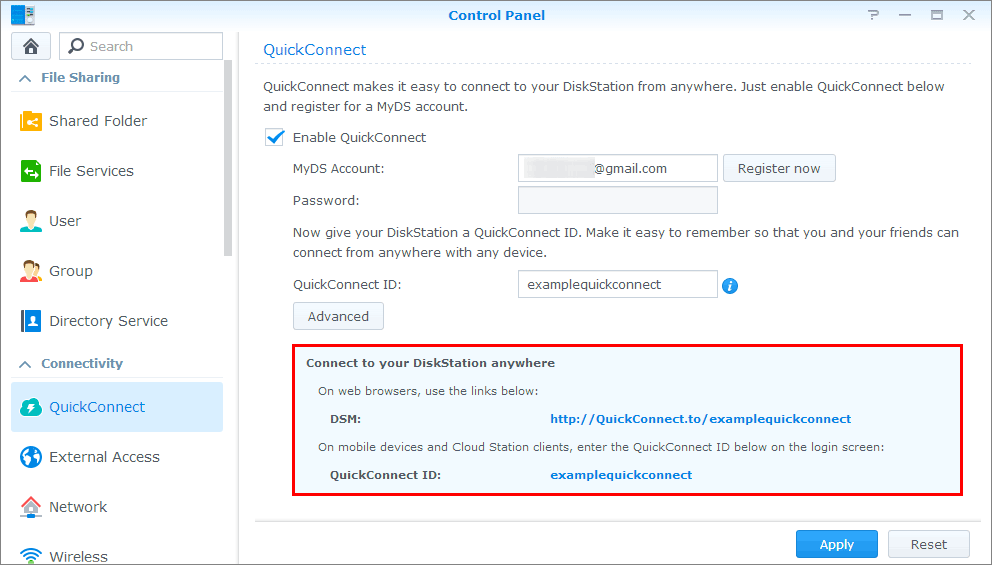 - Click to enlarge |
Quickconnect AdvancedQuickconnect Advanced Section If you don’t see the address for DSM, you can click Advanced and make sure DSM is enabled. |
Quickconnect Advanced Section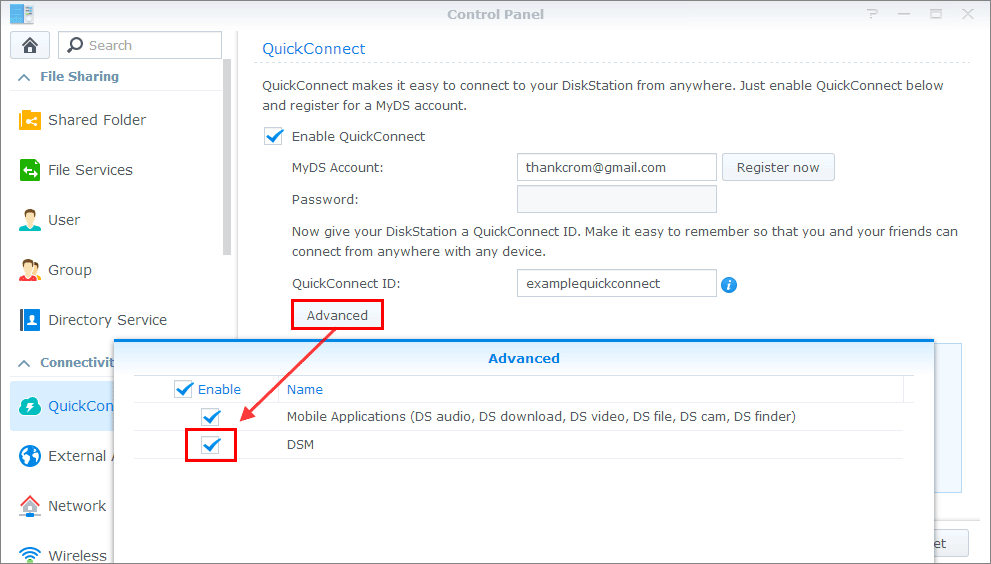 - Click to enlarge |
Quickconnect URLEnter Quickconnect URL to Browser With QuickConnect enabled, you can open a web browser and enter the QuickConnect address for accessing DSM. Hit Enter. |
Enter Quickconnect URL to Browser - Click to enlarge |
Synology LoginSynology DiskStation Login You will be redirected to the DSM login screen. Now you can use the QuickConnect address to access DSM from anywhere, anytime! |
Synology DiskStation Login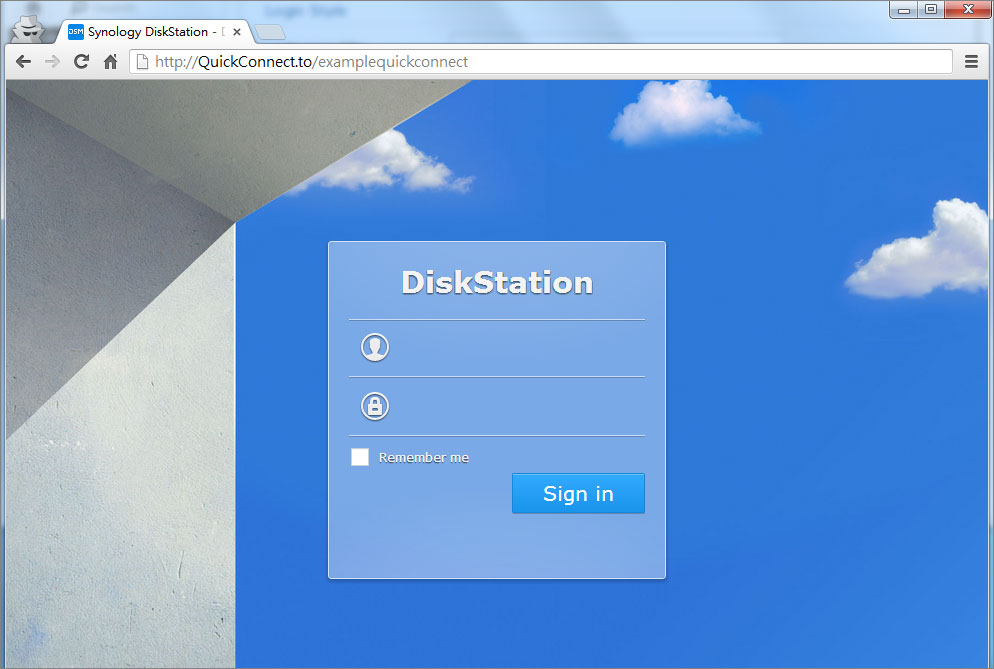 - Click to enlarge |
Ez-Internet MainmenuOpen Ez-Internet from Mainmenu 3. Use EZ-Internet to make Synology NAS accessible over the Internet EZ-Internet is a setup wizard that helps configure network settings and make your Synology NAS accessible over the Internet. EZ-Internet guides you through the process of setting up port forwarding, firewall, and DDNS service. This makes it possible to remotely access all services of your Synology NAS, such as DSM, file sharing services, and packages. For easy router setup with EZ-Internet, make sure your router supports UPnP and appears on Synology’s router support list. For other routers, manual port forwarding might be required.
|
Open Ez-Internet from Mainmenu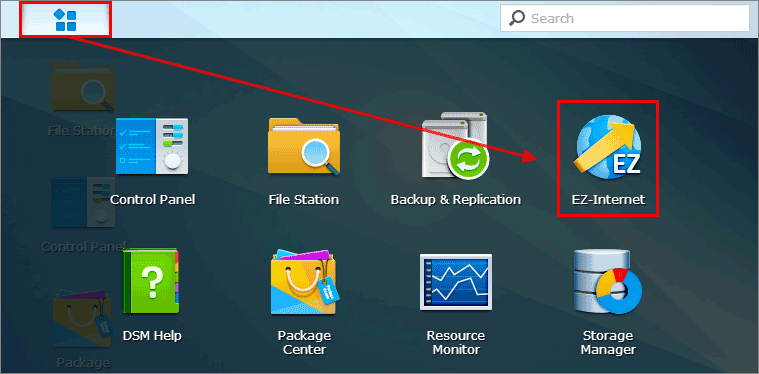 - Click to enlarge |
Ez-internet WelcomeEz-internet Welcome Screen 2. Click Next. |
Ez-internet Welcome Screen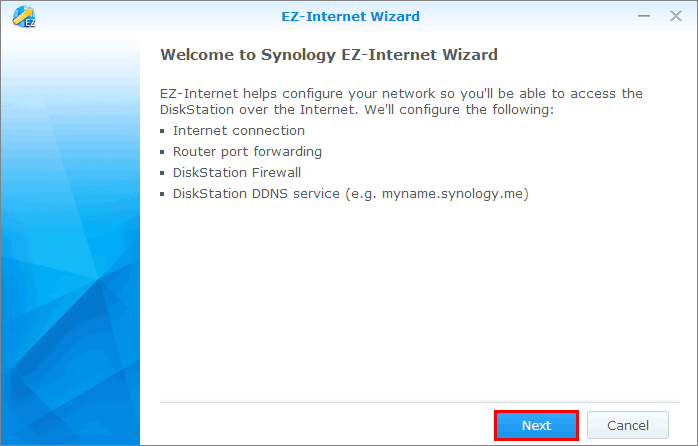 . |
Choose ConnectionChoose Router or Direct Connection 3. Choose one of the following and click Next.
4. Continue following the steps of the EZ-Internet wizard. You’ll be guided through port forwarding, firewall, and DDNS settings. |
Choose Router or Direct Connection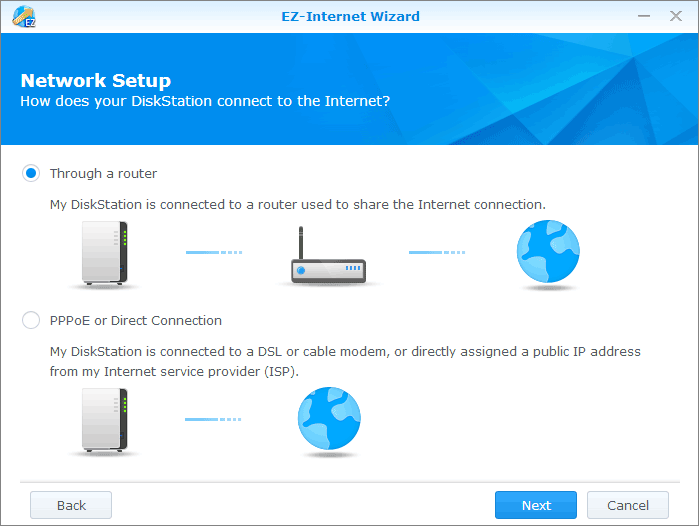 - Click to enlarge |
If the above method does not work, you will need to log into your router’s management interface. To do so, please consult the instruction manual provided by your router’s manufacturer.
Once you’ve found the router port forwarding configuration page, please refer to this article for a complete list of port numbers used by Synology products’ applications and services.
Once finished, you can register for a free DDNS hostname by going to Control Panel > External Access > DDNS. You can also go to Control Panel > Security > Firewall to configure the firewall settings for security.
See more for